Reserved Seating for Events: A Complete Setup Guide
Last updated: April 2026. This article is for informational purposes only. Statistics and third-party features referenced may have changed since publication. Terms apply.
The line forms at 6 AM. Fans camp outside the main hall for hours, hoping to get front-row seats for the headliner panel at 2 PM. When the doors open, there is a rush. Someone trips. Tempers flare. By the time the panel starts, half the audience is irritated and the organizer is fielding complaints.
This scenario plays out at conventions every weekend. Reserved seating eliminates it entirely -- but only if you set it up correctly. Done poorly, reserved seating creates its own set of headaches: empty seats from no-shows, confused attendees, and staff spending more time directing people than managing the event.
This guide covers when reserved seating makes sense, how to implement it well, and the pitfalls to avoid.
When to Use Reserved Seating vs. General Admission
Reserved seating is not appropriate for every session at your convention. Understanding when it adds value -- and when it adds unnecessary complexity -- is the first decision.
Use reserved seating when:
- Demand significantly exceeds capacity. If your headliner panel will draw 800 people to a 500-seat room, reserved seating lets you sell exactly 500 seats and manage the overflow with a waitlist instead of an angry mob at the door.
- You offer premium ticket tiers. VIP ticket holders expect guaranteed seating. Reserved seating lets you deliver on that promise with specific seat assignments rather than just "early entry."
- The session has structured pricing. Photo ops, special screenings, or exclusive Q&A sessions where different seat locations have different values (front row vs. back row) benefit from reserved seating with tiered pricing.
- Safety or crowd management requires it. Large main-stage events where uncontrolled rushing could create a safety hazard are better served by orderly, assigned seating.
Stick with general admission when:
- The room is small (under 100 seats). The overhead of managing reserved seating for a small panel room is not worth it. First-come-first-served with a room capacity limit works fine.
- Most sessions have adequate capacity. If demand rarely exceeds supply, reserved seating adds friction without solving a real problem.
- The session is casual or interactive. Workshops, meetups, and roundtable discussions work better when people can sit where they are comfortable and move around.
Many conventions use a hybrid approach: reserved seating for the 3-5 highest-demand sessions (headliner panels, celebrity Q&As, special screenings) and general admission for everything else. This is usually the right balance.
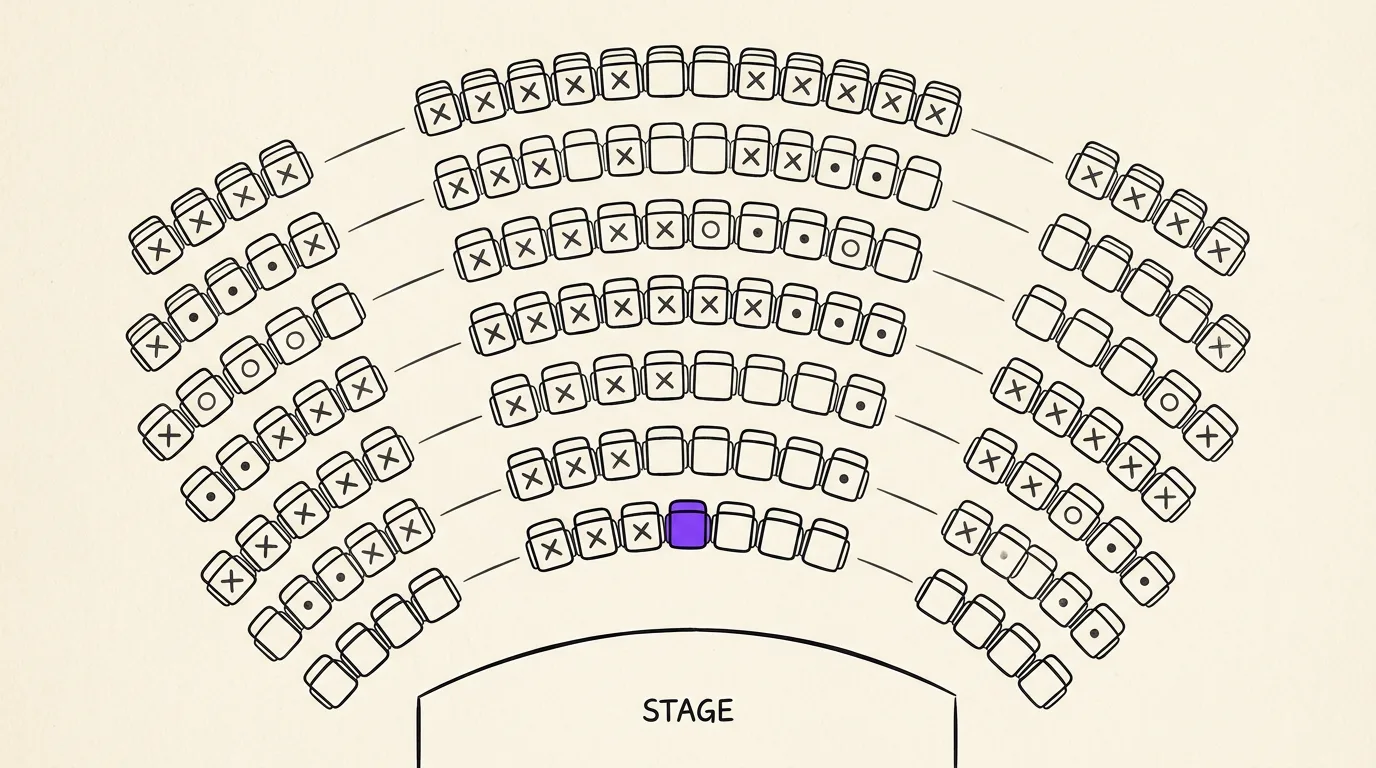
Building Your Seating Chart
A seating chart is only useful if it accurately represents the physical room. Start with the venue's official room layout, then adapt it for your specific event.
Steps to build an accurate chart
- Get the room dimensions and fixed elements. Pillars, AV equipment, camera risers, sound boards, and emergency exits all reduce usable seating. Never sell a seat behind a pillar or in a sightline blocked by equipment.
- Define your stage or focal point. Where will the panelists sit? Where will the screen be? This determines which seats are "front and center" vs. side or rear.
- Map rows and seat numbers. Use a consistent labeling system: Row A is the front, rows increment backward. Seat 1 starts on the left (from the audience perspective). This seems obvious, but inconsistent labeling is one of the most common mistakes.
- Account for aisle space. Fire code typically requires aisles every 10-14 seats. Do not try to squeeze in extra seats by narrowing aisles -- the fire marshal will make you remove them, and you will have to deal with refunds.
- Designate ADA-accessible seating. This is not optional. Place wheelchair-accessible spaces in multiple locations throughout the room -- not only in the very back. Include companion seats next to each accessible space. Check your local accessibility requirements; they vary by jurisdiction.
Pricing Tier Strategies
Not all seats are created equal, and your pricing should reflect that. Tiered pricing increases revenue without increasing capacity -- you are simply charging more for better seats that people demonstrably want.
Common tier structures
- Two-tier (simple): Premium (front section) and Standard (rear section). Easy to manage, clear value distinction. Premium is typically priced 50-100% above Standard.
- Three-tier (balanced): VIP (first 2-3 rows), Premium (rows 4-10), Standard (remaining rows). This is the most common structure for convention panels. VIP might be 2x Standard, Premium 1.5x Standard.
- Four-tier (detailed): Front Row, Premium, Standard, Economy. Use this for large-scale events (500+ seats) where the difference between front row and row 5 is meaningful to buyers. Front Row can command 3-4x the Economy price.
Be transparent about what each tier includes. If VIP also includes early entry, a gift bag, or a meet-and-greet, make that clear on the ticket page. If the only difference is seat location, say so -- attendees appreciate honesty and will still pay for better seats.
Dynamic pricing considerations
Some organizers increase prices as inventory decreases ("only 12 premium seats remaining -- price increases in 3 days"). This can drive urgency and increase revenue, but it can also frustrate attendees who feel manipulated. Use sparingly and always honor the price shown at the time of purchase.
Seat Holds: VIP, Sponsors, and ADA
Before you open sales to the public, you need to hold seats for people who are guaranteed placement:
- VIP ticket holders. If your VIP package promises reserved seating, block those seats first. Determine how many VIP tickets you will sell and hold that many seats in the VIP section.
- Sponsors. Most sponsorship agreements include complimentary seats at major events. Hold these seats and send assigned seat numbers to your sponsors before public sales open.
- ADA-accessible seats. These must remain available for people who need them. Do not release ADA holds to general sale unless you have a clear process for accommodating last-minute accessibility requests.
- Production and press. Camera operators, photographers, and media need clear sightlines. Hold seats or standing areas for them, typically along the aisles or at the back.
- Staff and volunteer seats. Room monitors and guest handlers need a seat too. Hold 2-4 seats per room for operational staff.
Track all holds in one system. The worst scenario is double-booking a seat -- telling two people they have the same seat leads to a confrontation that your staff has to mediate in real time.
Day-Of Check-In Flow
Reserved seating is only as good as your check-in process. Attendees need to know where their seat is, get there efficiently, and not displace someone else.
Recommended check-in flow
- Confirmation before arrival. Send a push notification or email the morning of the event with the attendee's seat assignment and a map showing where to enter the room.
- Dedicated entry point. If possible, use a separate entrance for reserved-seating attendees (vs. general admission attendees waiting for open seating). This prevents bottlenecks.
- QR scan at the door. Staff scans the attendee's ticket QR code, which shows the seat assignment on a tablet. Staff confirms the seat verbally ("Row C, Seat 14, that's the third row on your left") and directs them in.
- Row markers and seat numbers. Every row should be labeled with large, visible signage. Every seat should have a number visible from the aisle. If you are using folding chairs, print seat numbers on card stock and tape them to the seat backs.
- Ushers for the first 15 minutes. Station a volunteer at each aisle entrance for the first 15 minutes of seating to help people find their rows. Once most attendees are seated, ushers can move to other duties.
Handling no-shows
Empty seats in a sold-out show look bad and waste capacity. Establish a policy: if a seat holder has not checked in by 10 minutes before show time, release the seat to the standby line. Communicate this policy clearly at the time of purchase and again in the day-of notification.
Common Mistakes to Avoid
- Selling more reserved seats than the room holds. It sounds absurd, but it happens when seat counts are estimated rather than verified. Count the actual physical seats, subtract holds, and sell only what remains.
- Inconsistent seat numbering. If Row A, Seat 1 is on the left in one room and on the right in another, your staff and attendees will be confused. Pick a convention and apply it everywhere.
- No standby process. If you sell reserved seats but have no plan for the people who wanted them and could not get them, you will have a crowd at the door with nowhere to go. Always have a standby line with clear communication about whether seats may open up.
- Ignoring sightlines. A seat that cannot see the stage is not a seat worth selling. Walk every row before selling tickets. If a pillar blocks the view from seats 7-9 in Row F, remove those seats from inventory.
- Making it too complicated. If your check-in process requires three separate scans, a wristband swap, and a paper ticket stub, you have over-engineered it. One QR scan should be enough to confirm identity and seat assignment.
- Forgetting about late arrivals. People will show up after the session starts. Have a plan for seating them without disrupting the event -- typically by holding a few aisle seats or having an usher guide them to open seats.
Ready to streamline your event?
Confanum handles ticketing with seat assignments, QR check-in, and real-time capacity tracking -- so your reserved seating runs smoothly from sale to seat.
Schedule a DemoThe First-Time Convention Organizer's Complete Checklist
Seating is one piece of the puzzle -- see the full planning guide for first-time organizers.
How a Mobile App Transforms Attendee Engagement at Events
How QR check-in and push notifications tie into the reserved seating experience.
5 Proven Ways to Increase Vendor Revenue at Your Convention
While panels use reserved seating, your vendor hall benefits from a different kind of layout strategy.